No products in the cart.
13
Mar
Mar
The Best Manicotti Recipe
Get ready to dive into this cheesy sensation, where juicy flavors blend together harmoniously, complementing the tender pasta pockets perfectly. With each bite, you’ll be captivated by the delectable combination of creamy ricotta, aromatic herbs, and tangy tomato sauce. Your family and friends won’t be able to resist coming back for seconds.
So, what are you waiting for? Let’s embark on a culinary adventure and create memories around the dinner table with our best manicotti recipe. It’s time to elevate your cooking skills and experience the true essence of Italian cuisine.
History and Origin of Manicotti
Manicotti, a popular Italian dish, has a rich history that dates back centuries. Its origin can be traced to the regions of Campania and Lazio in Italy. The word “manicotti” translates to “little sleeves” in Italian, referring to the pasta tubes that are stuffed with delicious fillings.
The dish gained popularity in the United States during the Italian immigration wave in the late 19th and early 20th centuries. Italian immigrants brought their culinary traditions with them, including the beloved manicotti. Over time, it became a staple in Italian-American households and a favorite at special occasions and holidays.

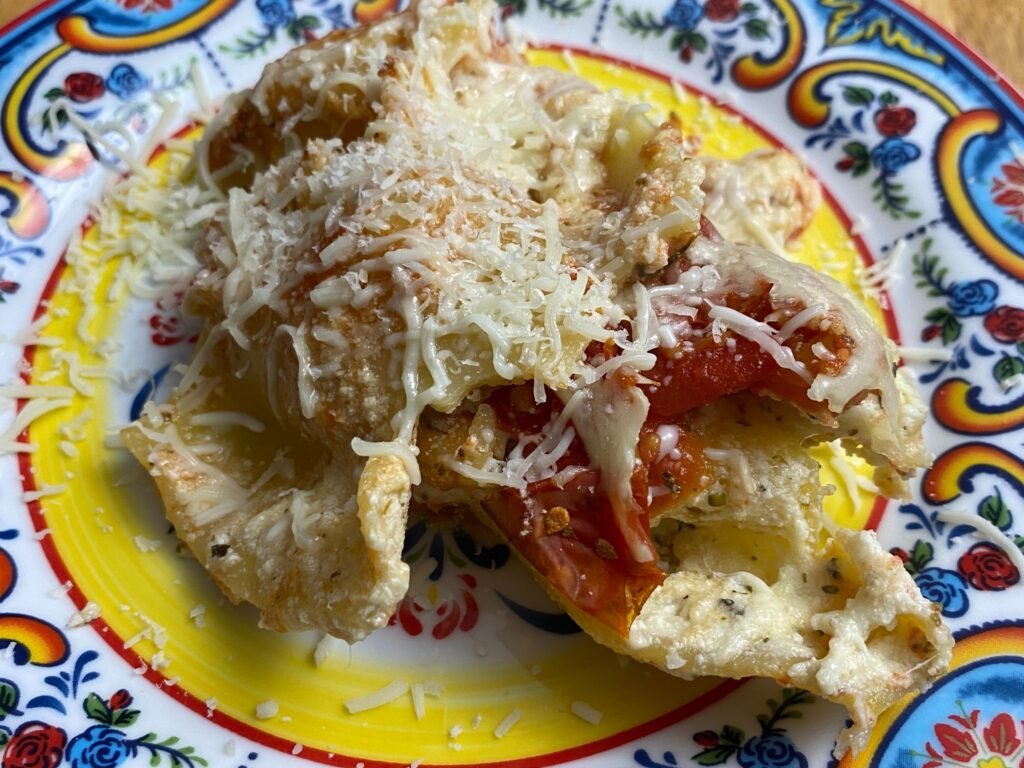
The Best Manicotti
Print Recipe Pin RecipeManicotti, a popular Italian dish, has a rich history that dates back centuries. Its origin can be traced to the regions of Campania and Lazio in Italy. The word "manicotti" translates to "little sleeves" in Italian, referring to the pasta tubes that are stuffed with delicious fillings.
Kitchen equipment list
- 1 Baking Dish
- 1 Mixing bowl
Ingredients
- 1 Box Manicotti pasta shells: Look for high-quality dried manicotti shells in your local grocery store. These hollow pasta tubes are perfect for filling with the delicious ricotta mixture.
- 15 oz Ricotta cheese: Opt for fresh, creamy ricotta cheese for the best results. Its mild flavor and smooth texture make it the perfect filling for manicotti.
- ½ cup Parmesan cheese: Grated Parmesan cheese adds a savory depth of flavor to the dish. Use freshly grated Parmesan for the best taste.
- 2 cups Mozzarella cheese: Shredded mozzarella cheese is essential for that gooey, cheesy goodness. It melts beautifully and adds a delightful stringy texture.
- 1 large Egg: Eggs act as a binding agent for the ricotta mixture, ensuring that it holds together while baking.
- 1 tbsp Italian Seasoning: Fresh herbs: Use a combination of fresh parsley and basil to infuse the dish with aromatic flavors. Chop them finely for even distribution.
- 1 Medium Jar of Tomato sauce: Choose a high-quality tomato sauce or make your own from scratch. The tangy tomato sauce complements the cheesy manicotti perfectly.
Instructions
- Cook the manicotti shells according to the package instructions. Be careful not to overcook them, as they will continue to cook in the oven. Drain and set aside.
- In a large mixing bowl, combine the ricotta cheese, grated Parmesan cheese, shredded mozzarella cheese, beaten eggs, chopped fresh herbs, sautéed garlic, and onion. Mix well until all the ingredients are evenly incorporated.
- Preheat your oven to 375°F (190°C).
- Spread a thin layer of tomato sauce on the bottom of a baking dish.
- Take a manicotti shell and spoon the ricotta mixture into it. Gently press the mixture down using the back of a spoon to ensure it fills the entire shell. Repeat with the remaining manicotti shells.
- Arrange the filled manicotti shells in the baking dish, nestling them close together.
- Pour the remaining tomato sauce over the manicotti, covering them completely.
- Sprinkle shredded mozzarella cheese on top of the sauce, creating a generous layer.
- Cover the baking dish with aluminum foil and bake for 25 minutes.
- Remove the foil and continue baking for an additional 10-15 minutes, or until the cheese is golden and bubbly.
- Once done, remove the baking dish from the oven and let it cool for a few minutes.
- Garnish with fresh basil leaves and grated Parmesan cheese before serving.
- Serve the manicotti hot and enjoy!
❋ Kitchen Chaos Unlocked Tips
Tips for Perfecting Your Manicotti Dish
- Be careful not to overcook the manicotti shells. They should be al dente, as they will continue cooking in the oven.
- Make sure to season the ricotta mixture well with salt and pepper to enhance the flavors.
- Sauté the garlic and onion until they are fragrant and translucent, adding depth of flavor to the dish.
- If you prefer a more robust filling, add some cooked ground beef or Italian sausage to the ricotta mixture.
- Don't skimp on the cheese! The combination of ricotta, Parmesan, and mozzarella creates a heavenly cheesy filling.
- Allow the manicotti to rest for a few minutes after baking. This will help the flavors meld together and make it easier to serve.
Nutrition
Serving: 132 gCalories: 222 kcalCarbohydrates: 16 gProtein: 14 gFat: 11 gCholesterol: 65 mg
Tried this recipe? Mention @KitchenChaosUnlocked or tag #KitchenChaosUnlocked!
Variations and Creative Twists on the Classic Manicotti Recipe
While the classic manicotti recipe is undeniably delicious, there are also creative variations that can elevate this Italian dish even further. Here are a few ideas to try:
- Spinach and Ricotta Manicotti: Add cooked spinach to the ricotta mixture for a nutritious twist. Sauté the spinach with garlic before mixing it in.
- Seafood Manicotti: For a seafood lover’s delight, replace the traditional ricotta filling with a mixture of shrimp, crab, and scallops. Top it with a creamy Alfredo sauce for a decadent treat.
- Pumpkin and Sage Manicotti: Embrace the flavors of fall by incorporating roasted pumpkin puree and sage into the ricotta mixture. Drizzle with brown butter sauce for a comforting and seasonal twist.
- Mediterranean Manicotti: Give your manicotti a Mediterranean flair by adding sun-dried tomatoes, Kalamata olives, and feta cheese to the filling. Top it with a tangy tzatziki sauce for a burst of freshness.
Recommended Side Dishes to Pair with Manicotti
Complete your manicotti feast with these delightful side dishes that perfectly complement the flavors of the dish:
- Garlic Bread: Crusty and buttery garlic bread is the perfect accompaniment to soak up the delicious sauce.
- Italian Salad: Fresh and vibrant greens tossed with cherry tomatoes, cucumbers, olives, and a simple vinaigrette make for a refreshing side dish.
- Roasted Vegetables: Roast a medley of seasonal vegetables such as zucchini, bell peppers, and eggplant for a colorful and healthy addition to your meal.
- Caprese Skewers: Skewer cherry tomatoes, fresh mozzarella balls, and basil leaves, drizzle with balsamic glaze for a bite-sized burst of flavor.
Serving and Presentation Ideas for Manicotti
When it comes to serving and presenting your manicotti, here are a few ideas to make it visually appealing:
- Individual Servings: Instead of a large baking dish, consider using individual ramekins or mini cast-iron skillets for a personalized touch.
- Garnish with Fresh Herbs: Sprinkle some fresh basil or parsley leaves on top of the dish to add a pop of color.
- Serve with a Drizzle of Balsamic Reduction: Drizzle a balsamic reduction over the manicotti before serving to add a touch of sweetness and elegance.
- Use a Decorative Baking Dish: Choose a beautiful oven-to-table baking dish that showcases your manicotti creation and doubles as a stunning centerpiece.
Frequently Asked Questions About Manicotti
- Can I make manicotti ahead of time?
Yes, you can assemble the manicotti ahead of time and refrigerate it until ready to bake. Just make sure to cover it tightly with plastic wrap or aluminum foil to prevent drying out.
- Can I freeze leftover manicotti?
Absolutely! Wrap the leftover manicotti tightly in plastic wrap and then in aluminum foil. It can be frozen for up to 3 months. When ready to enjoy, thaw it in the refrigerator overnight and reheat in the oven until heated through.
- Can I use a different type of pasta for manicotti?
While manicotti traditionally uses tube-shaped pasta, you can experiment with other types of pasta, such as large shells or cannelloni. Just adjust the cooking time according to the package instructions.
- Can I use a different type of cheese for the filling?
While ricotta is the classic choice for manicotti, you can also try using cottage cheese, goat cheese, or a combination of different cheeses for a unique twist.
Final Thoughts on the Best Manicotti Recipe
Congratulations! You’ve now mastered the art of making the best manicotti. With its rich history, flavorful ingredients, and endless variations, this Italian classic is sure to become a favorite in your kitchen. Whether you’re serving it to guests or enjoying a cozy family dinner, our manicotti recipe is guaranteed to impress.
So, gather your ingredients, follow the step-by-step instructions, and let the aromas of garlic, cheese, and tomato sauce fill your kitchen. Create cherished memories around the dinner table as you savor each mouthful of this cheesy delight. From its humble beginnings in Italy to its beloved status around the world, manicotti continues to be a timeless culinary masterpiece that brings people together.