No products in the cart.
28
Feb
Feb
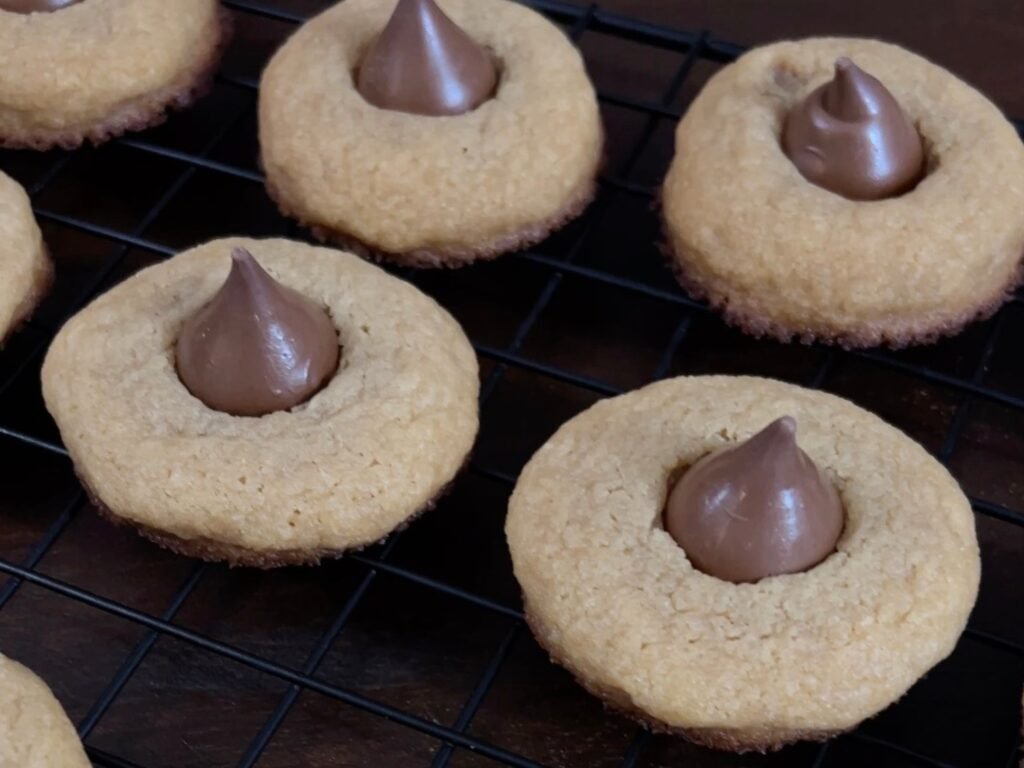
Peanut Butter Blossom Recipe
With just a handful of simple ingredients and an easy-to-follow method, you’ll be whipping up a batch of these Peanut Butter Blossom cookies in no time. The soft, chewy texture combined with the melty chocolate center creates a truly decadent experience for your taste buds.
Whether you’re planning a holiday gathering or simply want to indulge in some homemade goodness, these cookies are a crowd-pleaser every time. They also make for an impressive gift or dessert option for any occasion.
So why wait? Grab your apron, get those ingredients ready, and prepare to be amazed by the deliciousness of these Peanut Butter Blossom cookies. One bite and you’ll understand why they’re a timeless favorite. Get ready to wow your family and friends with this foolproof recipe!
History of Peanut Butter Blossom cookies
The history of the Peanut Butter Blossom cookie dates back to the early 1950s. The recipe was reportedly developed by Freda Smith, a home economist who worked for the Pillsbury Company. It was originally called “Peanut Butter Fingers” and was featured in a Pillsbury cookbook. The recipe gained popularity quickly and became a household favorite.
The signature element of Peanut Butter Blossom cookies is the chocolate kiss pressed into the center. This addition was not part of the original recipe but was later introduced to enhance the flavor and appearance of the cookies. The combination of peanut butter and chocolate proved to be a winning combination, and the cookies became a hit at parties and bake sales.
Today, Peanut Butter Blossom cookies are a beloved classic, often associated with holidays like Christmas and Valentine’s Day. The recipe has been passed down through generations, with each family adding their own personal touch.

Peanut Butter Blossom Recipe
Print Recipe Pin RecipeWith just a handful of simple ingredients and an easy-to-follow method, you'll be whipping up a batch of these Peanut Butter Blossom cookies in no time. The soft, chewy texture combined with the melty chocolate center creates a truly decadent experience for your taste buds.
Kitchen equipment list
- 1 Mixing bowl
- 1 Baking sheet
Ingredients
- 1 cup Creamy peanut butter
- ½ cup Unsalted butter, softened
- ½ cup Granulated sugar
- ½ cup Packed brown sugar
- 1 large Egg
- 2 tbsp Milk
- 1 tsp Vanilla extract
- 1¾ cups All-purpose flour
- 1 tsp Baking soda
- 1 tsp Salt
- Additional granulated sugar for rolling
- 48 Hershey's Kisses, unwrapped Make sure to gather all the ingredients before you start, as this will make the process much smoother. Having everything measured and ready to go will save you time and prevent any mistakes.
Instructions
- Preheat your oven to 375°F (190°C) and line a baking sheet with parchment paper or silicone baking mat.
- In a large mixing bowl, cream together the peanut butter, softened butter, granulated sugar, and brown sugar until light and fluffy. This can be done using an electric mixer or by hand.
- Add the egg, milk, and vanilla extract to the peanut butter mixture. Mix until well combined.
- In a separate bowl, whisk together the all-purpose flour, baking soda, and salt.
- Gradually add the dry ingredients to the peanut butter mixture, mixing until just combined. Be careful not to overmix as this can result in a tougher cookie.
- Shape the dough into 1-inch balls and roll them in additional granulated sugar. This will give the cookies a nice sparkle and a slightly crunchy exterior.
- Place the sugar-coated dough balls onto the prepared baking sheet, spacing them about 2 inches apart to allow for spreading.
- Bake the cookies in the preheated oven for 8-10 minutes, or until they are set and lightly golden around the edges.
- Remove the cookies from the oven and immediately press a Hershey's Kiss into the center of each cookie. The heat from the freshly baked cookies will slightly melt the chocolate, creating the iconic blossom shape.
- Allow the cookies to cool on the baking sheet for a few minutes before transferring them to a wire rack to cool completely.
- Repeat the process with the remaining dough until all the cookies are baked and adorned with a chocolate kiss.
- Once the cookies have cooled completely, store them in an airtight container to maintain their freshness. They can be enjoyed for up to a week, although they rarely last that long!
❋ Kitchen Chaos Unlocked Tips
Tips and tricks for perfect Peanut Butter Blossom cookies
To ensure your Peanut Butter Blossom cookies turn out perfect every time, here are some tried and tested tips and tricks:- Use creamy peanut butter for the best texture and flavor. Chunky peanut butter can alter the consistency of the dough.
- Soften the butter at room temperature before creaming it with the other ingredients. This will result in a smoother dough and better incorporation of flavors.
- Do not overmix the dough once the dry ingredients are added. Overmixing can lead to a tougher cookie, so mix until just combined.
- Roll the dough balls in granulated sugar before baking. This adds a delightful crunch and sparkle to the cookies.
- Press the Hershey's Kisses into the cookies immediately after they come out of the oven. The residual heat will slightly melt the chocolate, creating the perfect blossom shape.
- Allow the cookies to cool completely before storing them. This will prevent any condensation from forming and keep the cookies fresh for longer.
Nutrition
Serving: 21 gCalories: 100 kcalCarbohydrates: 11 gProtein: 1.8 gFat: 5.5 gFiber: 0.5 g
Tried this recipe? Mention @KitchenChaosUnlocked or tag #KitchenChaosUnlocked!
Variations and substitutions for Peanut Butter Blossom cookies
While the classic Peanut Butter Blossom recipe is undeniably delicious, there are plenty of variations and substitutions you can try to suit your preferences or dietary restrictions. Here are a few ideas:
- Chocolate lovers can experiment with different types of chocolate kisses, such as dark chocolate or white chocolate. You can also try using other chocolate candies or even caramel-filled chocolates for a unique twist.
- For a crunchy texture, roll the dough balls in chopped nuts before baking. Peanuts or chopped almonds work particularly well.
- If you’re a fan of peanut butter and jelly, consider adding a dollop of your favorite jam or jelly to the center of the cookie instead of the chocolate kiss. This will create a delightful PB&J Blossom cookie.
- To make the cookies gluten-free, substitute the all-purpose flour with a gluten-free flour blend. Make sure to check the labels of all your ingredients to ensure they are gluten-free.
- For a vegan version of Peanut Butter Blossom cookies, replace the butter with vegan butter or coconut oil, and use a flax egg (1 tablespoon of ground flaxseed mixed with 3 tablespoons of water) instead of the egg. Choose vegan-friendly chocolate kisses or use a vegan chocolate alternative.
Feel free to get creative and put your own spin on this classic recipe. The possibilities are endless!
Serving suggestions and storage tips for Peanut Butter Blossom cookies
Peanut Butter Blossom cookies are delicious on their own, but they can also be enjoyed in various ways. Here are some serving suggestions to enhance your cookie experience:
- Serve the cookies with a tall glass of cold milk for a classic and comforting combination.
- Add a scoop of vanilla ice cream between two Peanut Butter Blossom cookies to make an indulgent ice cream sandwich.
- Crumble the cookies over a bowl of vanilla yogurt for a tasty and crunchy parfait topping.
- Package a batch of Peanut Butter Blossom cookies in a decorative tin or box to give as a gift. They make for a thoughtful and delicious present.
When it comes to storing Peanut Butter Blossom cookies, proper storage is key to maintaining their freshness and flavor. Here are some tips:
- Store the cookies in an airtight container at room temperature. This will keep them soft and chewy.
- If you prefer a firmer texture, place the cookies in the refrigerator for a few hours before serving. This will also help preserve them for a longer period.
- To freeze the cookies, place them in a freezer-safe container or bag. They can be frozen for up to three months. Thaw them at room temperature before enjoying.
Peanut Butter Blossom cookies for special occasions and holidays
Peanut Butter Blossom cookies have become synonymous with certain occasions and holidays. Here are some ideas for incorporating these beloved cookies into your celebrations:
- Christmas: Arrange a plate of Peanut Butter Blossom cookies alongside other holiday treats for a festive dessert table. The combination of peanut butter and chocolate is perfect for the holiday season. You can even use red and green foil-wrapped chocolate kisses for an extra touch of holiday spirit.
- Valentine’s Day: Show your love and appreciation by making a batch of heart-shaped Peanut Butter Blossom cookies. Use a heart-shaped cookie cutter to cut out the dough, and press a chocolate kiss in the center as usual. These cookies make for a sweet and romantic gift.
- Birthdays: Surprise the birthday boy or girl with a tower of Peanut Butter Blossom cookies instead of a traditional cake. Stack the cookies on a cake stand and decorate with colorful sprinkles or personalized messages.
- Fourth of July: Celebrate Independence Day by adding a patriotic twist to your Peanut Butter Blossom cookies. Roll the dough balls in red, white, and blue sugar crystals for a festive look.
No matter the occasion, Peanut Butter Blossom cookies are sure to bring joy and delight to everyone.
Peanut Butter Blossom cookies for dietary restrictions (gluten-free, vegan, etc.)
If you or someone you know has dietary restrictions, you can still enjoy the goodness of Peanut Butter Blossom cookies. Here are some adaptations for different dietary needs:
- Gluten-free: Replace the all-purpose flour with a gluten-free flour blend. Make sure all your ingredients, including the chocolate kisses, are gluten-free.
- Dairy-free: Substitute the butter with a dairy-free alternative, such as vegan butter or coconut oil. Check the labels of your ingredients to ensure they are dairy-free, including the chocolate kisses.
- Vegan: Replace the butter with vegan butter or coconut oil, and use a flax egg (1 tablespoon of ground flaxseed mixed with 3 tablespoons of water) instead of the egg. Choose vegan-friendly chocolate kisses or use a vegan chocolate alternative.
- Nut-free: If you’re allergic to peanuts, you can still enjoy Peanut Butter Blossom cookies by using a different nut or seed butter. Almond butter, cashew butter, or sunflower seed butter are great alternatives. Just make sure they are free from any traces of peanuts.
Always double-check the labels of your ingredients to ensure they meet your dietary needs and preferences.
Conclusion and final thoughts on Peanut Butter Blossom cookies
In conclusion, Peanut Butter Blossom cookies are a timeless favorite for a reason. The combination of creamy peanut butter, sweet chocolate kisses, and a soft, chewy texture creates a cookie that is both comforting and indulgent. Whether you’re baking for a holiday gathering, special occasion, or simply craving a homemade treat, these cookies are sure to satisfy.
With a rich history, simple ingredients, and easy-to-follow instructions, making Peanut Butter Blossom cookies is a delightful experience. The versatility of this recipe allows for endless variations and adaptations to suit different tastes and dietary restrictions.
So why not gather your loved ones, put on your apron, and create some sweet memories with a batch of Peanut Butter Blossom cookies? Their irresistible aroma and delicious taste will have everyone coming back for more. Enjoy!