No products in the cart.
Benefits of cooking with cast-iron cookware
Cast-iron cookware has been a staple in kitchens for centuries, and for good reason. Not only does it offer exceptional heat retention and distribution, but it also imparts a unique flavor to dishes that cannot be replicated with other types of cookware. When it comes to preparing our Buttery Cast-Iron Shrimp with Honey Over Salad recipe, using a cast-iron skillet is essential for achieving the perfect texture and flavor. Here are some of the benefits of cooking with cast-iron cookware:
- Heat retention: One of the standout features of cast-iron cookware is its ability to retain heat. This means that once the skillet is heated, it will maintain a consistent temperature throughout the cooking process. When cooking shrimp, this is particularly important as it allows for even cooking and prevents overcooking or undercooking.
- Even heat distribution: Cast-iron skillets distribute heat evenly across the surface, ensuring that all parts of the shrimp cook at the same rate. This means that you won’t end up with some shrimp that are perfectly cooked while others are still raw. The even heat distribution also helps to develop a beautiful sear on the shrimp, enhancing the flavor and appearance of the dish.
- Non-stick properties: When properly seasoned, cast-iron cookware develops a natural non-stick surface. This means that you can cook the shrimp with minimal oil or butter, resulting in a healthier dish. The non-stick properties also make it easier to flip the shrimp and prevent them from sticking to the skillet.
- Versatility: Cast-iron cookware can be used on the stovetop, in the oven, and even on the grill. This versatility makes it a great investment for any kitchen. In the case of our Buttery Cast-Iron Shrimp with Honey Over Salad recipe, you’ll be using the skillet on the stovetop to cook the shrimp to perfection.
To fully enjoy the benefits of cast-iron cookware, it’s important to properly care for and maintain it. This includes regular seasoning, avoiding harsh detergents, and drying it thoroughly after each use. With the right care, your cast-iron skillet will last a lifetime and continue to enhance your culinary creations.
Benefits of using honey in the recipe
Honey is a versatile ingredient that adds a touch of sweetness to both sweet and savory dishes. In our Buttery Cast-Iron Shrimp with Honey Over Salad recipe, honey plays a crucial role in balancing the savory flavors of the shrimp and adding a hint of sweetness to the dish. Here are some of the benefits of using honey in this recipe:
- Natural sweetness: Honey is a natural sweetener that adds a unique depth of flavor to dishes. Unlike refined sugar, honey contains trace amounts of vitamins, minerals, and antioxidants that can provide health benefits in addition to its sweet taste.
- Flavor enhancer: Honey has a distinct flavor profile that can enhance the overall taste of a dish. In our recipe, the sweetness of the honey complements the savory notes of the shrimp, creating a harmonious blend of flavors that will leave your taste buds craving for more.
- Caramelization: When honey is heated, it undergoes a process called caramelization, which deepens its flavor and creates a rich golden color. In our recipe, the honey-coated shrimp develop a beautiful caramelized crust that adds visual appeal and enhances the taste.
- Nutritional benefits: While honey should be consumed in moderation due to its high sugar content, it does offer some nutritional benefits. It contains antioxidants that can help fight inflammation and boost the immune system. Additionally, honey has been used for centuries as a natural remedy for coughs and sore throats.
When using honey in the recipe, it’s important to choose a high-quality honey that is free from additives and has a pure, natural flavor. Look for raw or unfiltered honey for the best results. Now that we’ve explored the benefits of using honey, let’s move on to the next section to learn how to prepare the salad.

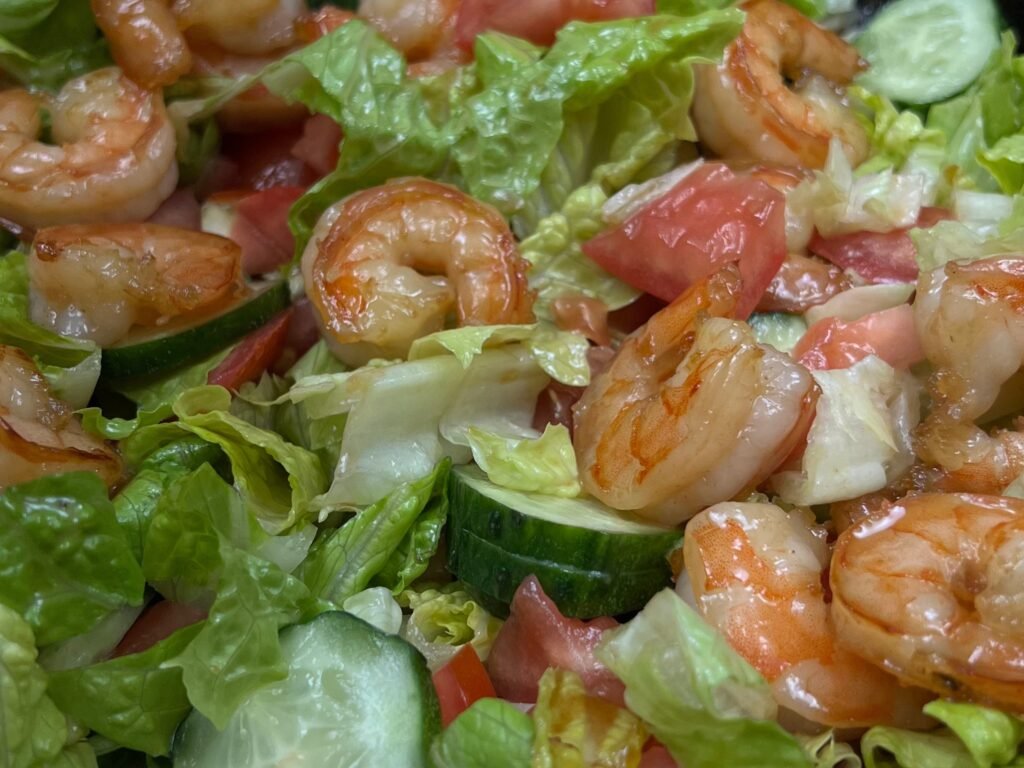
Cast-Iron Shrimp with Honey
Print Recipe Pin RecipeCast-iron cookware has been a staple in kitchens for centuries, and for good reason. Not only does it offer exceptional heat retention and distribution, but it also imparts a unique flavor to dishes that cannot be replicated with other types of cookware.
Kitchen equipment list
- 1 Cast Iron Skillet
Ingredients
For the shrimp:
- 1 lb Large shrimp, peeled and deveined
- 4 tbsp Unsalted butter
- 2 tbsp Extra virgin olive oil
- 1 tbsp Lemon juice (Optional)
- Salt and pepper to taste
For the salad:
- 4 cups Lettuce chopped
- 1 cup Cherry tomatoes, halved (Or one large tomato chopped)
- 1 small Red onion, thinly sliced (Optional)
- 1 medium Cucumber, sliced
- ¼ cup Crumbled feta cheese (Optional)
- 2 tbsp Extra virgin olive oil
- 2 tbsp Balsamic vinegar
- 1 tbsp Honey
- Salt and pepper to taste
Instructions
- Preheat the cast-iron skillet - Place the cast-iron skillet on the stovetop over medium heat. Allow it to heat up for a few minutes until it reaches a medium-high temperature.
- Melt the butter - Add the butter to the skillet and let it melt completely. Swirl the butter around the skillet to coat the bottom evenly.
- Add the shrimp - Carefully place the peeled and deveined shrimp in a single layer in the skillet. Allow them to cook undisturbed for about 2 minutes on each side, or until they turn pink and opaque. Flip the shrimp using tongs or a spatula to ensure even cooking.
- Season with lemon juice (optional), salt, and pepper - Drizzle the honey over the shrimp and sprinkle them with salt and pepper to taste. Stir gently to coat the shrimp evenly with the flavors.
- Cook for an additional minute - Continue cooking the shrimp for an additional minute, stirring occasionally. This will allow the flavors to meld together and ensure that the shrimp are fully cooked.
- Remove from heat - Once cooked, remove the skillet from the heat and set it aside. The residual heat will keep the shrimp warm while you prepare the salad.
❋ Kitchen Chaos Unlocked Tips
Tips for achieving the perfect buttery shrimp
Cooking shrimp may seem like a simple task, but there are a few tips and tricks that can elevate your dish to the next level. By keeping these tips in mind while preparing the buttery shrimp, you'll ensure a fantastic flavor profile and a delightful dining experience. Here are some tips for achieving the perfect buttery shrimp:- Choose high-quality shrimp: The quality of the shrimp you use will greatly impact the taste and texture of the dish. Opt for fresh, wild-caught shrimp if possible, as they tend to have a sweeter and more tender flavor compared to farmed shrimp.
- Don't overcook the shrimp: Shrimp cook very quickly, and overcooking them can result in a rubbery texture. Keep a close eye on the shrimp while cooking, and remove them from the skillet as soon as they turn pink and opaque. This will ensure that they remain tender and juicy.
- Season the shrimp generously: Shrimp have a mild flavor, so it's important to season them well to bring out their best qualities. Don't be afraid to use salt, pepper, and other seasonings to enhance the taste of the shrimp. The addition of lemon juice adds a tangy brightness that complements the buttery flavor.
- Let the shrimp rest before serving: After cooking the shrimp, let them rest for a few minutes before serving. This allows the juices to redistribute, resulting in more flavorful and succulent shrimp.
- Use a cast-iron skillet for optimal results: As mentioned earlier, using a cast-iron skillet is key to achieving the perfect buttery shrimp. The skillet's ability to retain and distribute heat evenly ensures that the shrimp cook to perfection and develop a beautiful sear.
Nutrition
Serving: 190 gCalories: 228 kcalCarbohydrates: 39 gProtein: 17 gFat: 1.4 gCholesterol: 142 mg
Tried this recipe? Mention @KitchenChaosUnlocked or tag #KitchenChaosUnlocked!
Making another healthy salad
To complement the rich buttery shrimp, our recipe calls for a refreshing salad that provides a crisp and nutritious base. Here’s a step-by-step guide on how to make the salad:
- Step 1: Prepare the salad greens – Start by washing the mixed salad greens thoroughly under cold water. Pat them dry using a clean kitchen towel or a salad spinner to remove any excess moisture. Place the greens in a large bowl.
- Step 2: Add the cherry tomatoes and red onion – Slice the cherry tomatoes in half and thinly slice the red onion. Add them to the bowl with the salad greens.
- Step 3: Prepare the cucumber – Wash the cucumber and slice it into thin rounds. You can leave the skin on or peel it, depending on your preference. Add the cucumber slices to the bowl.
- Step 4: Crumble the feta cheese – Crumble the feta cheese into small pieces and sprinkle it over the salad greens and vegetables. The saltiness of the feta cheese will complement the sweetness of the honey-coated shrimp.
- Step 5: Prepare the dressing – In a small bowl, whisk together the extra virgin olive oil, balsamic vinegar, and honey until well combined. Season the dressing with salt and pepper to taste.
- Step 6: Dress the salad – Drizzle the dressing over the salad mixture in the bowl. Toss the salad gently using salad tongs or clean hands, ensuring that all the ingredients are evenly coated with the dressing.
- Step 7: Taste and adjust seasonings – Before serving, taste the salad and adjust the seasonings if necessary. You can add more salt, pepper, or honey to suit your personal preferences.
By following these simple steps, you’ll have a vibrant and refreshing salad that pairs perfectly with the buttery shrimp. Now, let’s move on to the next section to discover some tips for assembling the salad.
Tips for assembling the salad
Creating a visually appealing and delicious salad is all about the art of assembly. By following these tips, you’ll be able to create a salad that not only tastes great but also looks stunning:
- Mix and match colors and textures: Incorporate a variety of colorful and contrasting ingredients to create visual interest. Use different types of salad greens, such as spinach or arugula, to add depth and texture to the salad. The vibrant colors of the cherry tomatoes, red onion, and cucumber will make the salad visually appealing.
- Layer the ingredients: Start by placing the salad greens at the bottom of a large serving dish or individual plates. Add the cherry tomatoes, red onion, cucumber, and crumbled feta cheese on top of the greens. This layering technique ensures that each bite contains a variety of flavors and textures.
- Drizzle the dressing strategically: Rather than pouring the dressing directly over the salad, drizzle it in a zigzag pattern or concentric circles. This helps to distribute the dressing evenly while also adding an artistic touch to the presentation.
- Garnish with fresh herbs: Sprinkle some fresh herbs, such as parsley or dill, over the top of the salad for an added burst of flavor and a pop of color. This simple garnish can elevate the overall presentation and make the salad feel more gourmet.
- Serve the salad chilled: To enhance the crispness and freshness of the salad, refrigerate it for at least 30 minutes before serving. This will allow the flavors to meld together and create a more refreshing dining experience.
By following these tips, you’ll be able to assemble a salad that is not only visually appealing but also bursting with flavor. Now that we’ve covered the assembly of the salad, let’s move on to the next section to explore some serving and presentation suggestions.

